
What is a Pressure Regulator Valve, How Do they Help?
mhiplumbers • April 10, 2023
Understanding Pressure Regulators & How to Replace
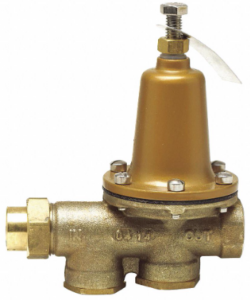
A pressure regulator valve for water is a device that is used to control the water pressure in a plumbing system. Its purpose is to maintain a constant and safe water pressure level regardless of fluctuation. The valve works by reducing the water pressure as it enters the building.
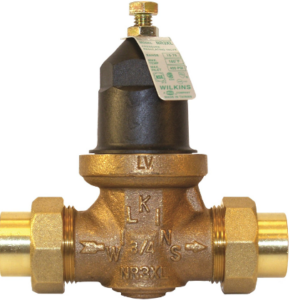
Union X FIP
This is especially important in areas where water pressure can often be too high, such as in high-rise buildings or areas with steep elevation changes. A pressure regulator valve Is to be installed at the main water line entering the home or building. When doing your annual/bi-annual home inspection it is important to take a pressure reading. This will ensure if and when your pressure dose change it can be adjusted.
How to Remove & Install a Pressure Regulator
- Turn off the water supply: Before starting with the installation process, turn off the water supply to the house or the specific water line where the pressure regulator valve is being installed. This can be done by turning off the main water valve.
- Identify the location: Locate the area where the pressure regulator valve needs to be installed. This is usually near the main water supply line where it enters the house, but can also be near a water heater or other individual appliance.
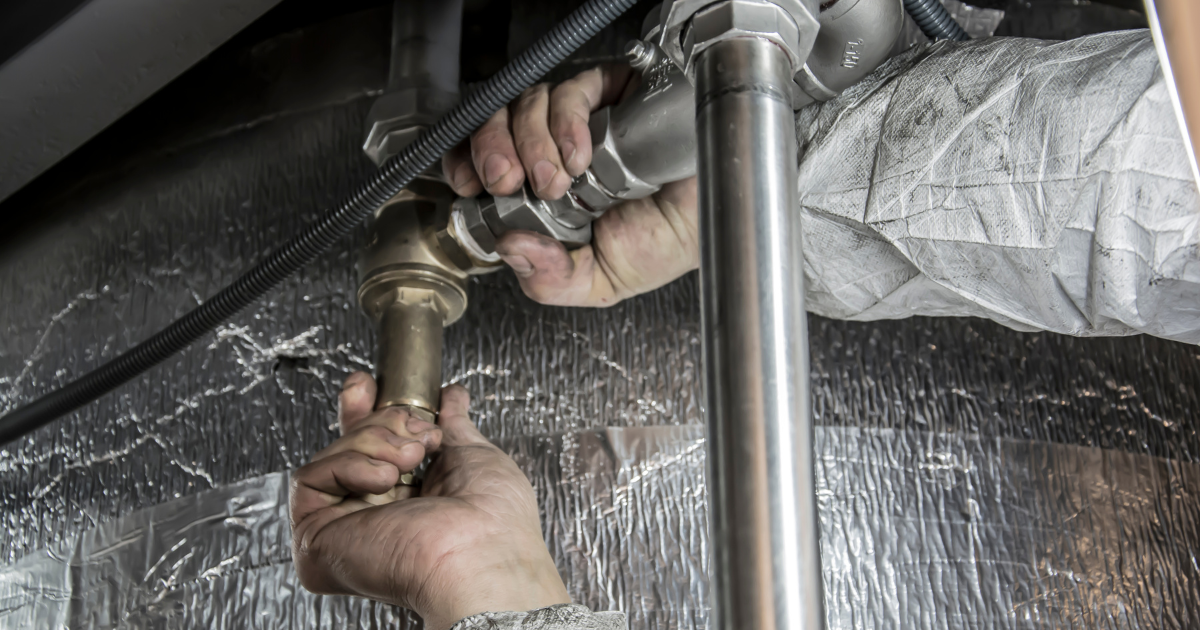
- Remove the old valve: If there are two nuts “unions” break then loose then remove old vale. if there is 1 nut “union” loosen it, the other side will have a nipple/MIP treading into the valve using a back hold loosen the valve from the threaded connection.
- Install the new valve: Then reverse process. When installing make sure the flow arrow is going the right way. Be sure to use teflon tape and pipe dope for threaded connections. Only pipe dope on unions.
- Set the desired pressure: Turn the water supply back on and adjust the valve to the desired pressure using a pressure gauge. Make sure water is running from a faucet when setting pressure, this will give you a running pressure. Follow the instructions provided to raise and lower pressure.
- Test the water supply: Turn on the water supply and check all faucets, showers, and appliances to make sure the water pressure is consistent and at the desired level.
- Finalize the installation: Once everything has been tested and is working properly, secure any additional fittings and pipes as needed. Re-check all connections to ensure there are no leaks.
Avoid costly plumbing problems during a kitchen remodel with expert tips. Learn how to protect your kitchen plumbing and streamline your renovation from start to finish.
Learn how to handle a burst pipe with this step-by-step emergency plan. From shutting off water to calling a professional plumber, read expert tips from MasterCraft Plumbers.